Networking Multiple Isadora Computers Together
(WORK IN PROGRESS)
Table of Contents:
Section 1: Physical Setup For Local Area Network (LAN)
Section 2: Creating a Local Area Network on a Mac
Section 3: Setting a Static IP on a Mac
Section 4: OSC Transmit+OSC Listener Actors in Isadora
Section 5: Net Broadcaster+Listener Actors in Isadora
Section 1: Physical Setup For Local Area Network (LAN)
Steps for Setup
- Get a wireless router or a router, not an ethernet switch.
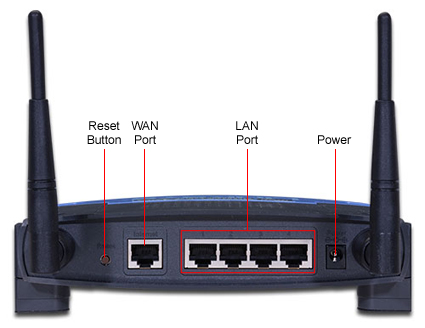
A Wireless Router
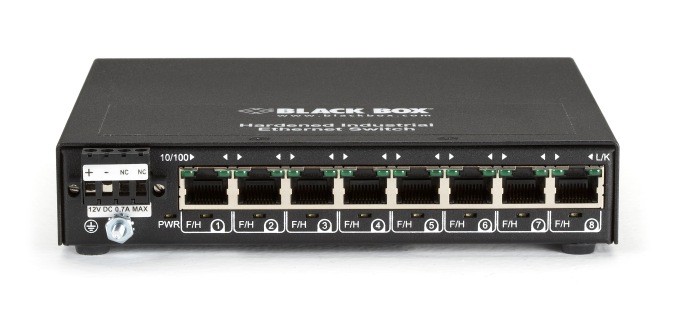
An Ethernet Switch
- Connect each of the computers that you’d like to network together to the Local Area Network (LAN) Ports on the back of the router with Cat6 Cable.
- (Shielded Cat6 is more expensive than unshielded Cat6, but you’ll have fewer problems with interference [Shielded Cat6 vs. Unshielded Cat6 Link]).
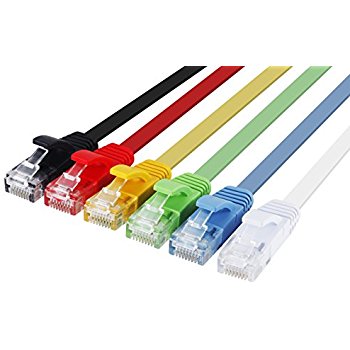
Cat6 Ethernet Cable
- This will create a Local Area Network (LAN) with the computers that you have hooked up to the router.
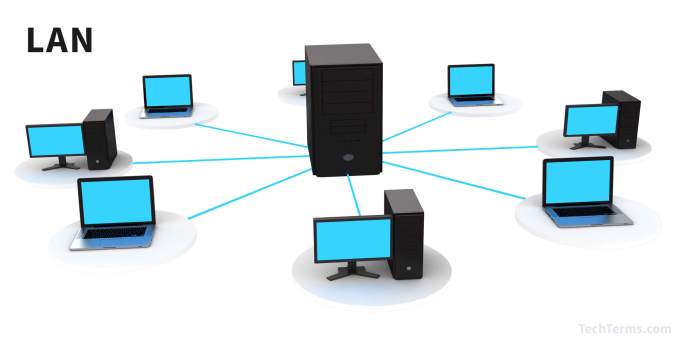
Representation of a Local Area Network (Alternate Caption – 2001: A LAN Odyssey)
Section 2: Creating a Local Area Network on a Mac
Helpful Link: LAN on Mac
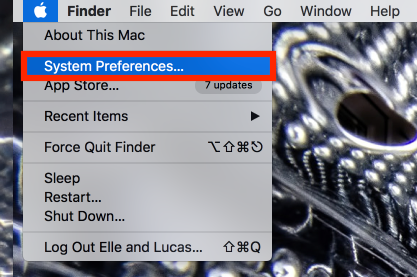
System Preferences
- Left-click on the Apple symbol on the top left of your screen.
- Select “System Preferences” from the dropdown menu to open the System Preferences Window.
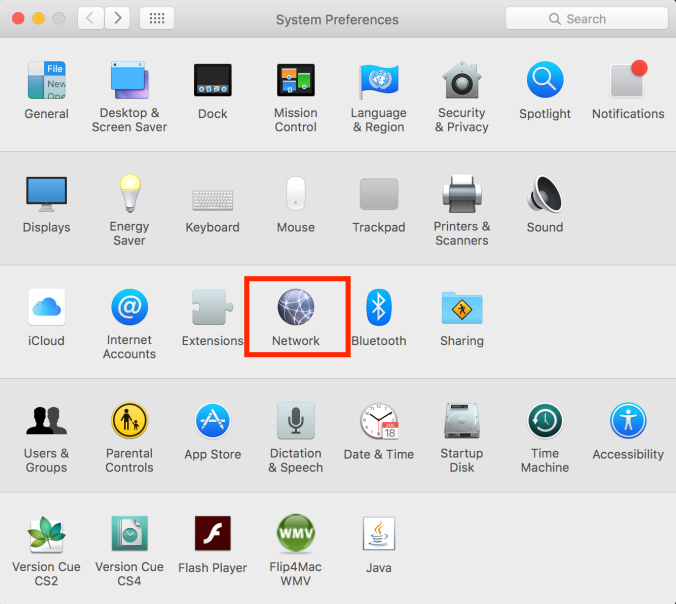
System Preferences Window
- Left-click on the “Network” icon to open the Network Window.

Creating a New Service in the Network Window
- Left-click on the small “+” symbol at the bottom left of the Network Window to create a new service.
- Name the service whatever you like; for the purposes of this tutorial, I chose “Manual”.
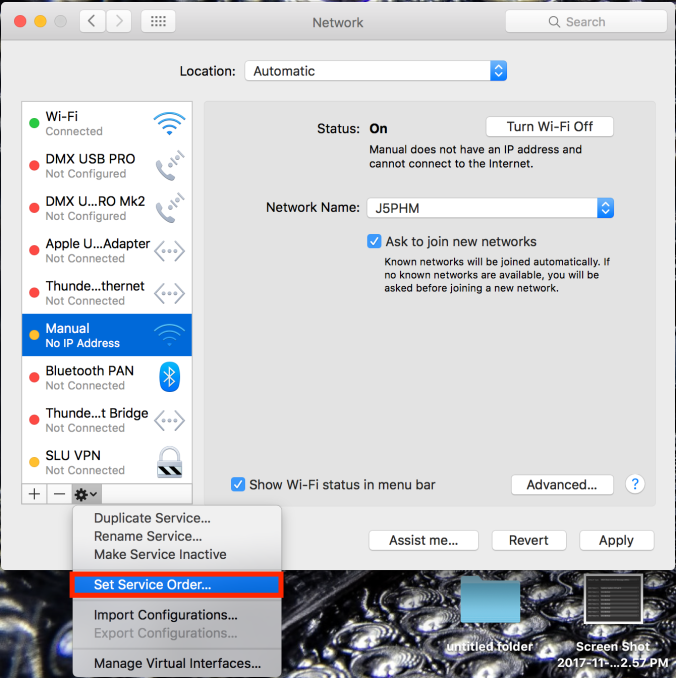
Set Service Order
- Left-click on the small gear symbol at the bottom left of the Network Window.
- Select “Set Service Order” from the dropdown menu.
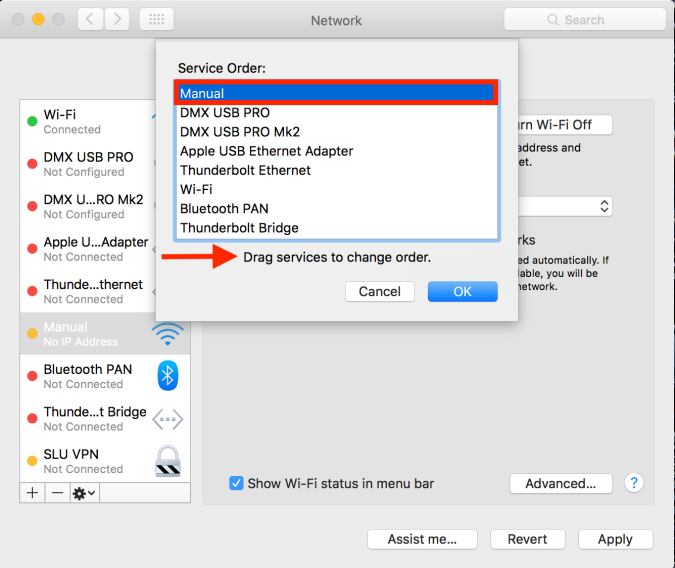
Dragging “Manual” to the Top
- Left-click and hold on the new service (Manual), drag it to top of the list, and then release the left-click button.
- By putting our new service at the top of the list, we ensure that it is given priority.
- Press “OK”
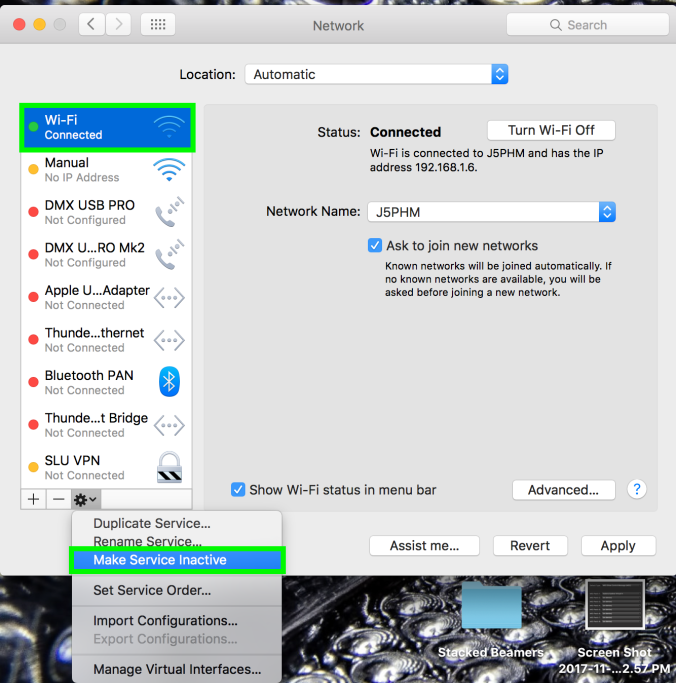
Making Wi-Fi Inactive
- Left-click on “Wi-Fi” in the list to the left of the Network Window.
- Click on the small gear on the bottom left and select “Make Service Inactive” from the dropdown menue
- This prevents you from being on more than one network at once, which can sometimes cause problems.
- NOTE: If you want to use your wireless again, you MUST make this service active!
Section 3 – How to Set a Static IP Address on a Mac
Why are we doing this?
Setting a static IP ensures that your networked computers will always have the same IP address. This eliminates the possibility of issues caused by any of your computers’ IP addresses changing so that you don’t need to waste time troubleshooting, looking up your new IP address, or reprogramming anything in order to set up this system. It makes the system more stable overall, and also allows you to document what the IP address of each machine is and will always be. This is extremely important for a setup you plan on breaking down and re-assembling again and again (as one would in a touring situation).
Steps for Setup
- Open the Network Window via System Preferences (just like in Section 2 above)
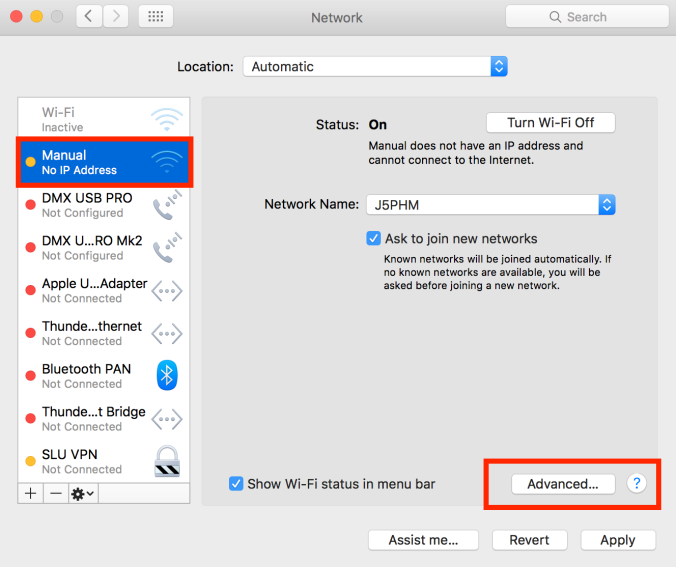
Advanced Options
- Left-click on your new service from the list on the left (Manual).
- Left-click on the button that says “Advanced” in the bottom right of the Network Window.
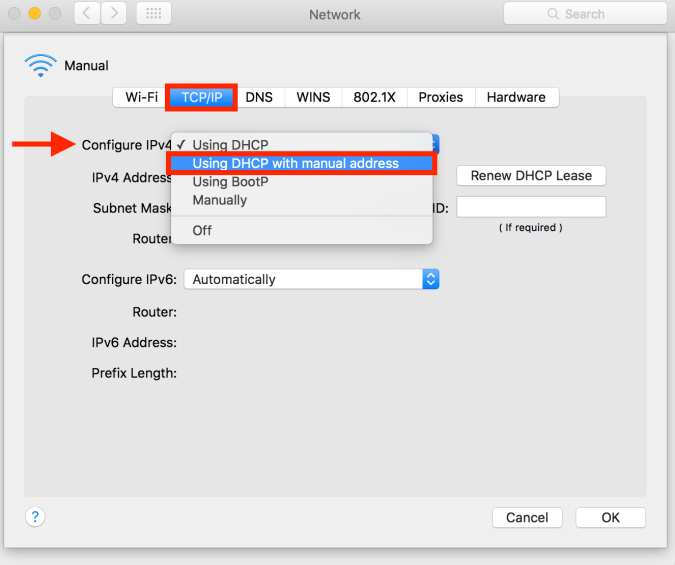
TCP/IP Tab > Configure IPv4 > Using DHCP with Manual Address
- Left-click on the TCP/IP Tab.
- Left-click on “Using DHCP” to the right of “Configure IPv4” to bring up a dropdown menu.
- Select “Using DHCP with manual address from the dropdown menu.
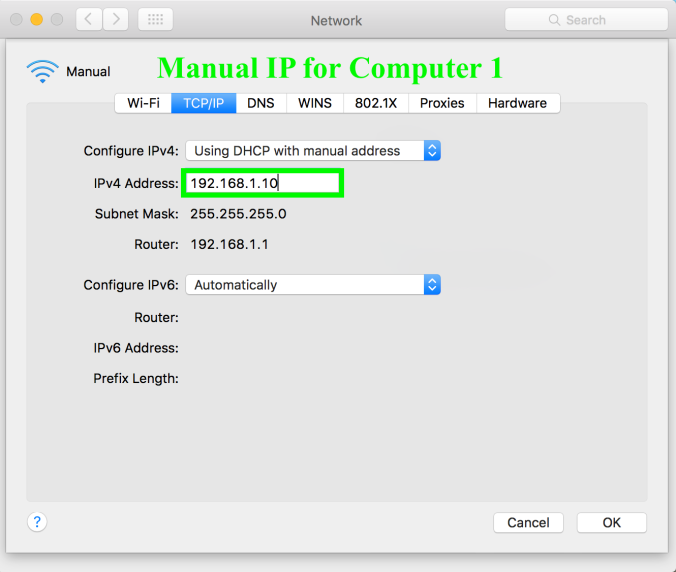
Setting the Static IP for Computer 1
- On your “Computer 1” the Static IP address to 192.168.1.10
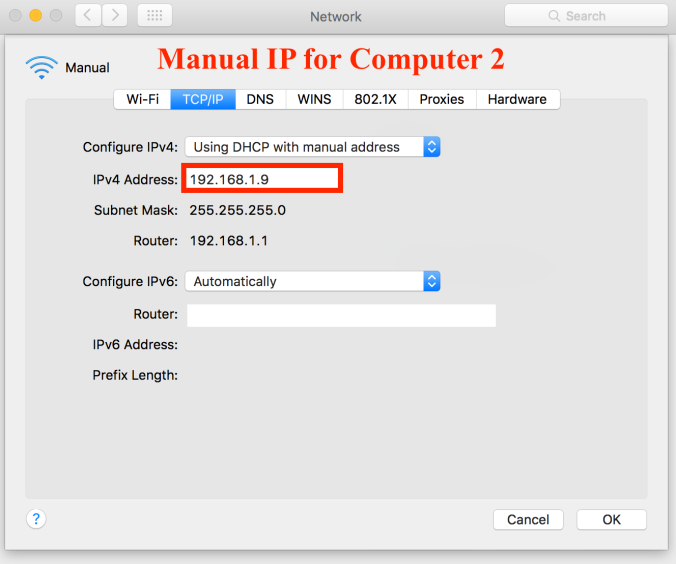
Setting the Static IP for Computer 2
- On your “Computer 2”, repeat all previous steps, but set the Static IP to 192.168.1.9
Things to Double Check
- Make sure that all of your computers/devices are using the same subnet mask
- In this case: 255.255.255.0
- Make sure that all of your computers/devices are using the same router address
- In this case: 196.168.1.1
- If these numbers do not match between your devices, then they will not communicate.
- If they do not match, you can select “Manually” instead of “Using DHCP with manual address” from the Configure IPv4 dropdown menu, and then set the subnet mask and router address of one computer to match the other manually.
Section 4: OSC Transmit+OSC Listener Actors in Isadora
Description of OSC Transmit Actor
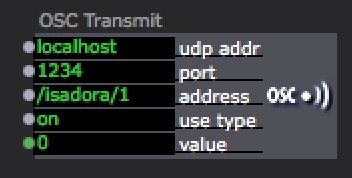
- OSC Transmit Isadora Actor
Isadora Manual pages 402-403, OSC Transmit:
[The OSC Transmit actor] Sends Open Sound Control messages to another application running on the same computer, or to one running on another computer connected via a local area network.
Open Sound Control is a standardized way to send high-resolution data from one application to another. The OSC Transmit actor allows Isadora to send values to another application. For more information on Open Sound Control, please refer to “Open Sound Control Support” on Page 222.
Input Properties
udp addr: The IP address of the computer on which the target application is running. You can use the special address localhost to send data to an application running on the same computer as Isadora.
port: The UDP port number on which the program is receiving data. Check the target application to see the UDP port on which it is received.
address: The OSC address to which the data will be sent. Check the documentation for the target application to find out the names of the OSC addresses it supports.
use type: When turned on, the “type tag” information is sent along with the packet. If you are sending data to another copy of Isadora, this flag must be turned on – otherwise the other copy of Isadora won’t receive the messages.
value: The value to transmit. Each time a new value arrives at this input, an OSC packet with that value is transmitted to the UDP address, port, and OSC address specified in the udp addr, port and addr inputs.
Steps for Setup
- Download and open >>>This Isadora Patch<<<
- Navigate to the first Isadora Scene
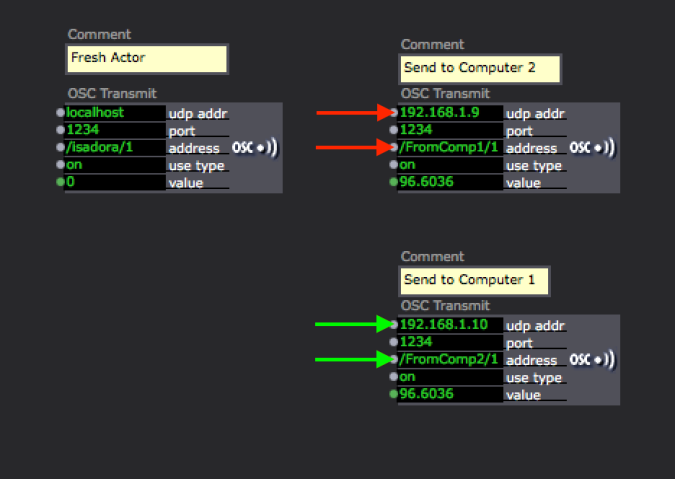
Fresh OSC Transmit Actor vs. Custom Settings for Computers 1 and 2
- Notice to the left, there is a fresh OSC Transmit actor.
- This is what OSC Transmit actors look like when you place them.
- Notice to the right, I’ve customized the Inputs of two OSC Transmit actors.
- NOT DONE NOT DONE NOTE DONE

OSC Listener Isadora Actor
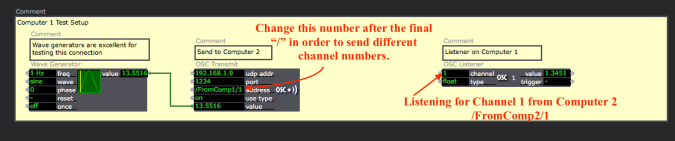
Computer 1 OSC Test Setup
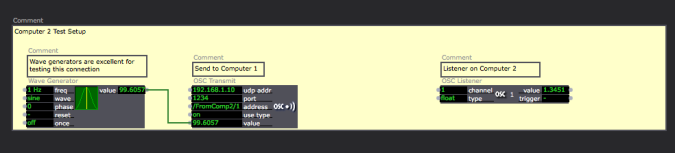
Computer 2 OSC Test Setup
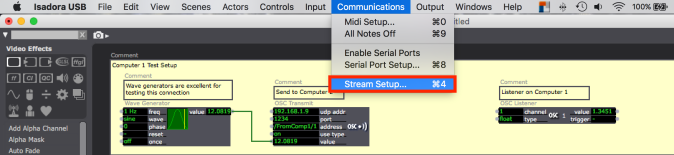
Communications > Stream Setup
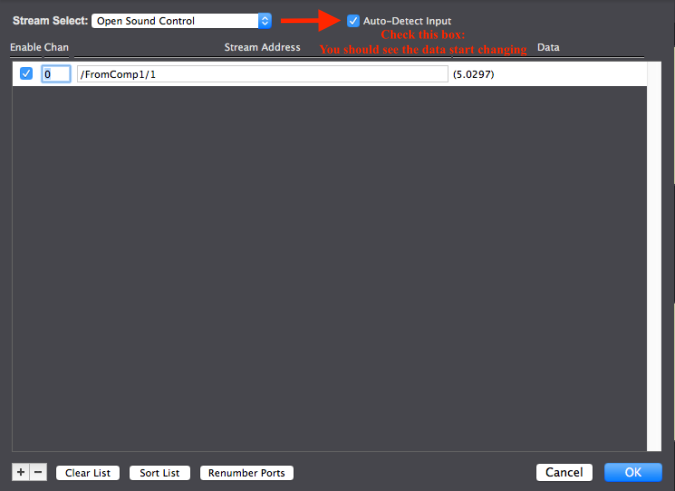
Auto-Detect Inputs
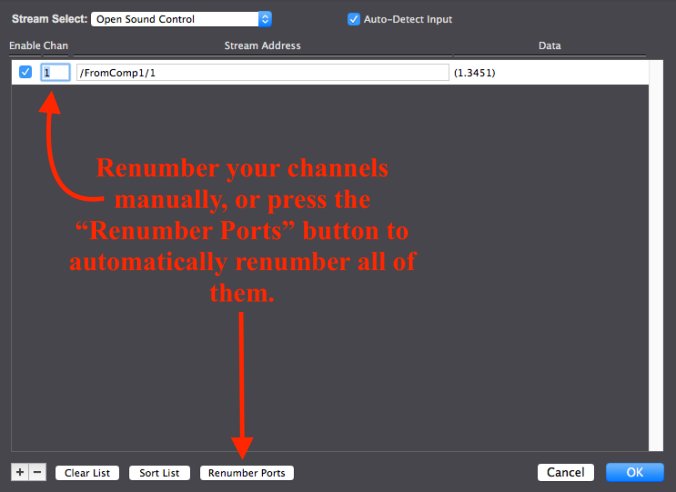
Renumbering OSC Channels
- You can renumber your OSC channels manually, one at a time, by left-clicking the number to the left of the data information for each OSC channel.
- You can renumber all of your OSC channels automatically by left-clicking the “Renumber Ports” button at the bottom-middle of the Stream Setup Window.

Diagram of OSC Transmit+OSC Listener Actors’ Data Flow
- Open the test Isadora Patch on both computers.
- Navigate to NOT DONE NOT DONE NOT DONE
Section 5: Net Broadcaster+Listener Actors in Isadora

Navigating to Isadora Preferences
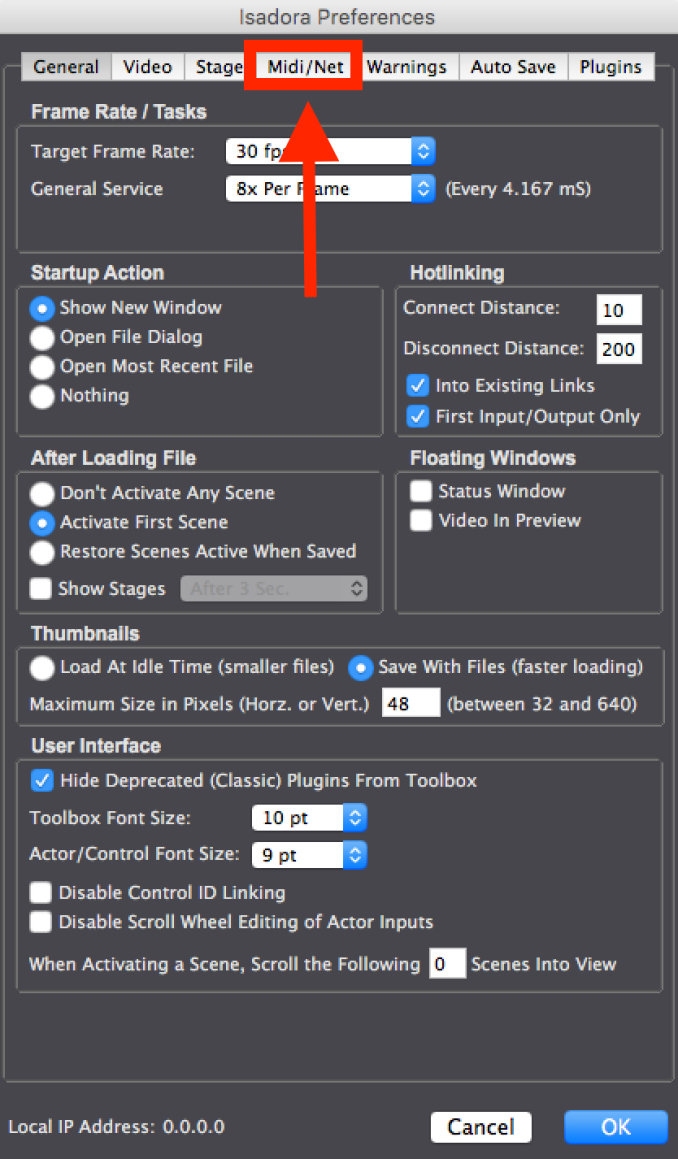
Isadora Preferences > MIDI/Net
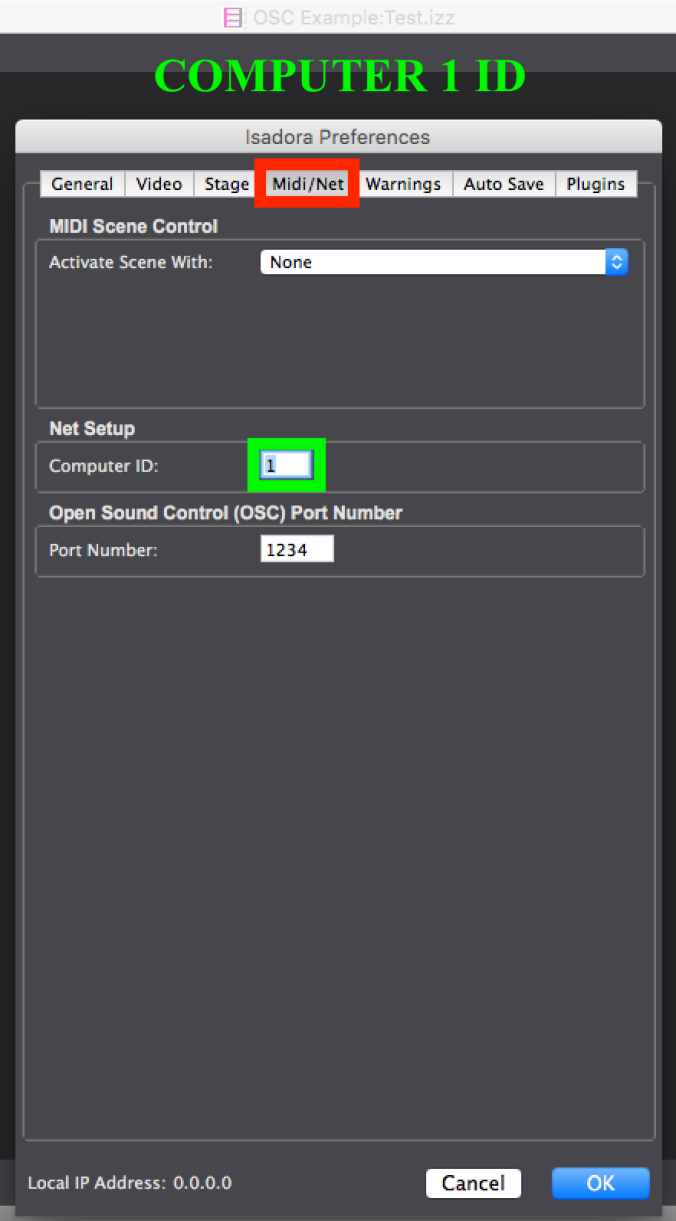
Setting the Computer ID for Computer 1
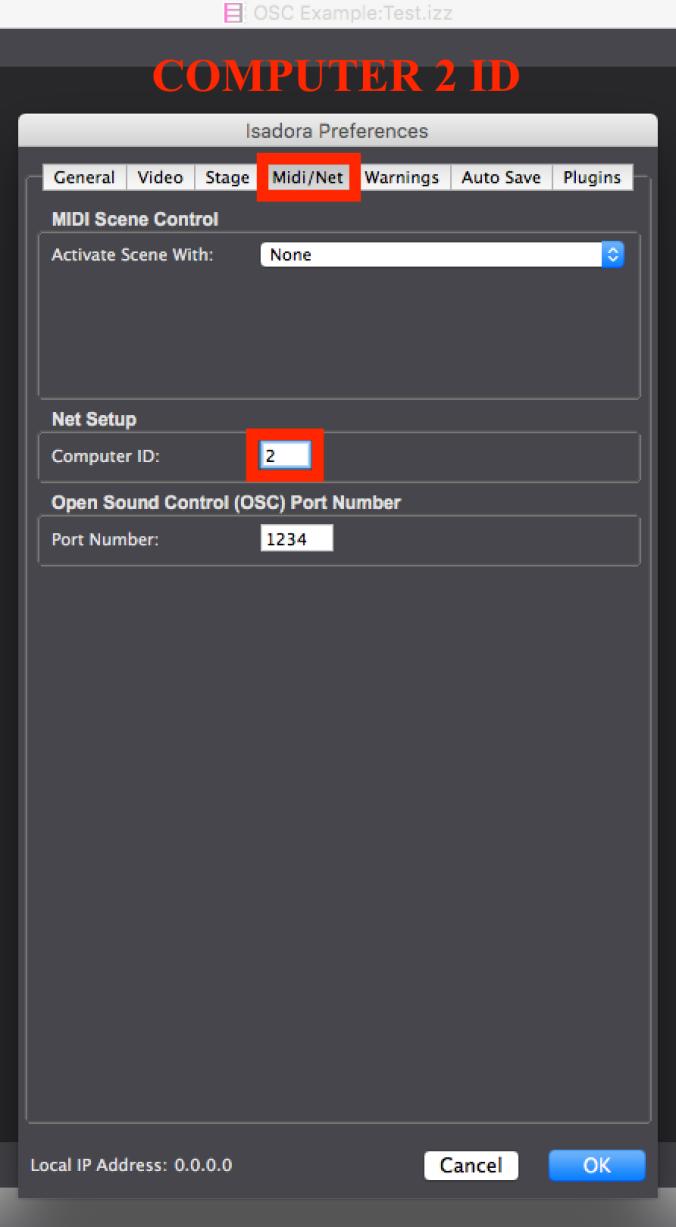
Setting the Computer ID for Computer 2
Description of Net Broadcaster Actor
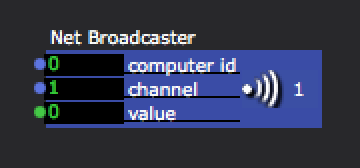
- Net Broadcaster Isadora Actor
Isadora Manual page 397, Net Broadcaster:
Sends a numeric value to other computers on a Local Area Network. Net Broadcaster allows you to send values from one computer to another when they are connected via a local area network. Whenever a numeric value is received at the Net Broadcaster’s value input, that value is “broadcast” to over the local area network on the channel specified by the channel input property. Any copy of Isadora on the LAN whose Net ID matches the specified target id, and who has an active Listener actor set to receive on a matching channel will “hear” the broadcast value and send that value to its value output. Note that if the Net Broadcaster’s target id is set to 0, then all machines on the network will receive the broadcast values, regardless of their Net ID.
Currently you can only send numeric values using the Net Broadcaster. You cannot send video or audio data.
For this module to work, the following conditions must be true:
1) The computers are connected by a local area network. This network can be a physical, Ethernet connection, a wireless connection, or any other hardware that supports the TCP/IP protocol. The actual address doesn’t matter, as Isadora uses a technique called “multi-casting” that does not require the sender to know the IP address of the target. What does matter is that your machine has a valid address.
2) The computers must have a valid TCP/IP address when Isadora is started up.
Input Properties
- target id: When this input is set to 0, the message will be received by every machine on the network. When it is non-zero, then only the machine whose Net ID matches the specified value will receive the message. The Net ID can be set in the Preferences under the “Net” tab.
- channel: Specifies the channel on which this value will be broadcast. Only Listener actors whose channel input property the value specified here will “hear” the broadcast.
- value: Whenever a numeric value is received at this input, it is broadcast over the LAN with the target id and channel specified. Note that this input is mutable. When you make the first link to this input, it will change its data type to match the data flowing through the new link. (For more on mutable inputs or outputs, please see “Mutable Inputs and Outputs” on page 100.)
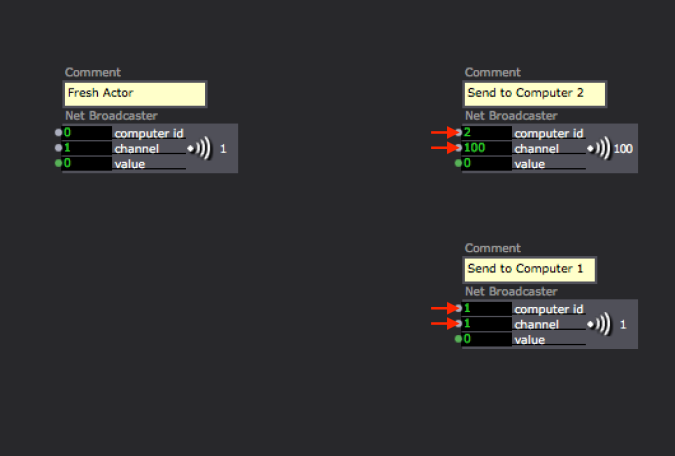
Net Broadcaster Example
Listener Actor Description
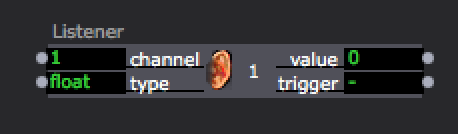
- Listener Isadora Actor
Isadora Manual page 361, Listener:
Receives a value from a Broadcaster actor.
Listeners are primarily used to receive values sent by Broadcasters in a secondary active Scene. (See the Activate Scene actor for more information on secondary Scenes.) Whenever a Broadcaster actor sends a new value, and the channel on which it was transmitted matches that specified by the channel property of this actor, the value will be echoed to the Listener’s value output.
You can also use the Broadcaster/Listener pairs within the same scene if desired, since values are broadcast to all active scenes.
Input Properties
- channel: Specifies the channel on which this Listener will receive values. This actor will only “hear” values sent by Broadcaster actors who are broadcasting on a matching channel.
- type: Specifies the type of data that will be received by this actor. Setting this property controls the type of the value output property. Note that type conversion will still take place if possible, e.g., if a float is received and this property is set to integer, the floating-point value will be converted to an integer before it is sent to the output.
Output Properties
- value: Whenever a value is received from a Broadcaster, it is sent out of this output. Note that his output will change its data type to match that specified by the type input property.
- trigger: Whenever a value is sent out of the value output property, this output trigger is pulsed.
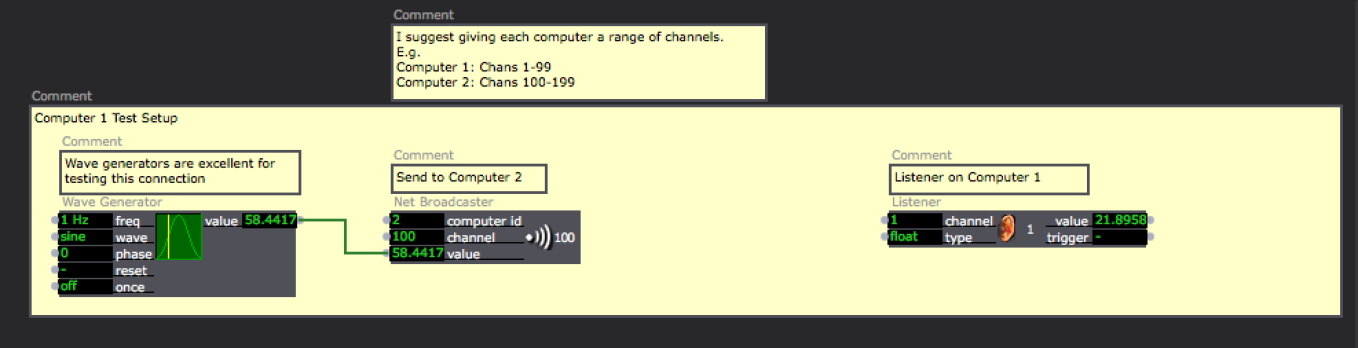
Computer 1 Net Broadcaster Test Setup
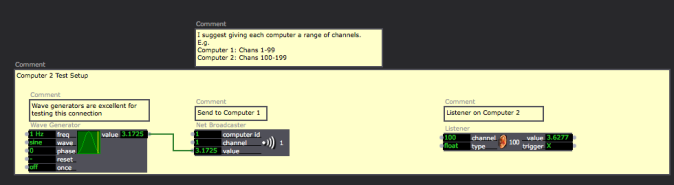
Computer 2 Net Broadcaster Test Setup

Diagram of Net Broadcaster+Listener Actor Data Flow
